
Adding a DHCP lease exclusion is typically a simple task on most routers—just a few clicks to add the desired IP to an exclusion list. However, on RouterOS, the process is quite manual and requires a bit more effort. This guide will walk you through the steps to create a DHCP exclusion in RouterOS, leveraging its granular configuration capabilities.
Lets take a look at two different approaches to achieve the same end result.
Option 1: create exclusions bound to an invalid or “blackhole” MAC/ID.
Option 2: create split IP pool ranges.
Both of these options assume you already have a DHCP server setup, and that your network is more or less operating in a standard way.
Option 1 (MAC Address Exclusion):
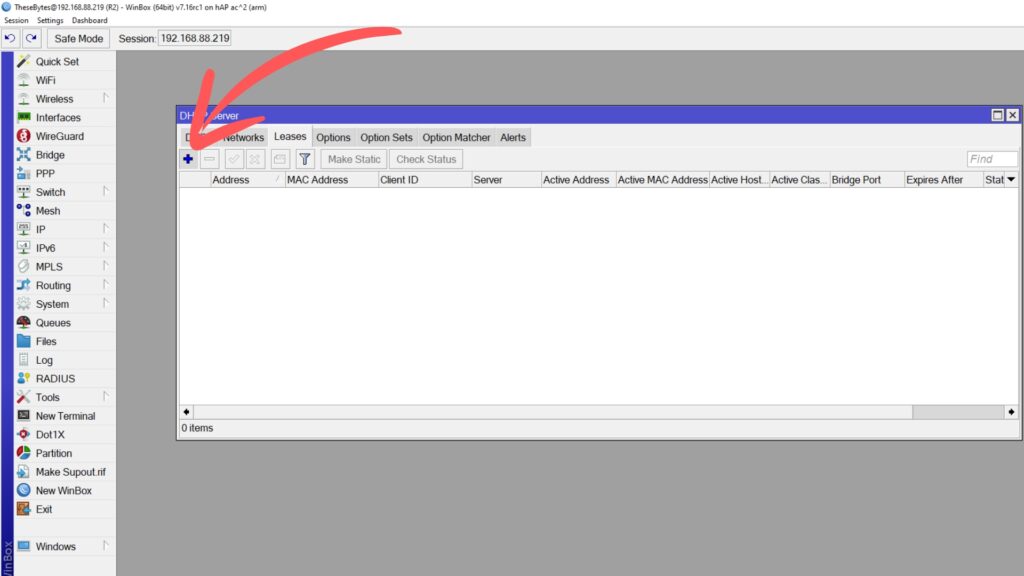
Login to your Mikrotik router that hosts your DHCP server. Click on IP > DHCP Server > Leases

Inside your leases table, if the network is operational you’re likely going to see a few entries in here. Most likely all of them will have the D flag on them to indicate that the lease was created dynamically by the DHCP server. This is of course unless you’ve already made static entries before.
Next lets create an exclusion by adding a bogus static lease into here. To do this Click on the + button in the top left of the DHCP server window.
The next settings for the exclusion depend on the network setup you have etc, but for me I’m just running the default Mikrotik config and LAN range of 192.168.88.0/24. Lets suppose I want to create an exclusion for 192.168.88.2. To do this I’ll Add 192.168.88.2 to the Address field, the MAC Address will be 00:00:00:00:00:00, the Client ID will be EXCL-192.168.88.2-01 and the Server will be all. I have only one DHCP server on this router, but if you have multiple be sure to select the specific server this exclusion should be set to. Click OK and this will now be added as an exclusion. As an added bonus I’ll also add the client ID as a comment to this lease.

This has effectively created a DHCP exclusion for the address 192.168.88.2.

Lets do a quick summary of what this config does, and why certain things are the way they are:
Firstly, we created a static DHCP lease for the IP address 192.168.88.2 and bound it to 00:00:00:00:00:00 which is an invalid MAC address. In the real world unless someone has spoofed their MAC to look like 00:00:00:00:00:00, it should never come up. Secondly, we assigned a unique client ID to this lease. For the DHCP server to assign this lease, the requesting device must meet both criteria: it must have the matching client ID and a MAC address of 00:00:00:00:00:00. Since it’s highly improbable for a legitimate device to meet both criteria, we can confidently assume that this IP address will never be assigned which in essence creates a DHCP exclusion!
You can make as many DHCP exclusions as you like using 00:00:00:00:00:00 as the MAC address so long as the client ID is different. I’m using a simple nomenclature for my client ID’s that follows this basic logic:
EXCL-192.168.88.1-01
EXCL: Indicates this is an exclusion.
192.168.88.1: Refers to the IP address 192.168.88.1.
01: Unique identifier in case you need to create multiple exclusions.
Option 2 (Split IP Pool Ranges):
When setting up a DHCP server, an IP pool is typically created alongside it, which is then used to manage the leased IP addresses. By adjusting the range, you can split the pool up and effectively create IP exclusions.
In Winbox go to IP > Pool > Select the pool used by your DHCP server.

Double click on the pool you’re using to open it up. In the Addresses field, you’ll see your IP pool range with the start IP, and the end IP. The hyphen represents everything in-between that range, so in my case my IP pool contains 192.168.89.2 to 192.168.89.254 and everything in-between.

In the Addresses field hit the downward facing arrow on the right hand side to create a new field input.
This is where the exact config will change depending on what you need excluded. For my network I want to exclude 192.168.89.101-192.168.89.119 so that I have 19 IP addresses excluded from the pool that I can assign statically.
To do this I will edit my first range that is 192.168.89.2-192.168.89.254 and change it to 192.168.89.2-192.168.89.100. After doing that I will click on the downward facing arrow to add a new range and add in 192.168.89.120-192.168.89.254. The first range ends on .100 and the new range begins at .120 therefore the 19 IP addresses between .100-.120 will be excluded from the DHCP pool and will not be handed out.

Both options are perfectly viable but the exact implementation should be considered. If you need to exclude a large amount if IP’s, editing pool ranges would be more efficient and less messy. If it’s just one or two exclusions, the MAC binding option is quick and easy to implement.