In this guide we’re taking a look at one possible way to setup a “drop all, except whitelisted IP addresses” config. The premise for this setup, is to be a very easy way to stop network users from visiting websites other that what we explicitly allow.
It’s important to note that the whitelist really only works for websites and services that use a single IP address to host their content. Sites like Facebook.com, Youtube.com and other services that use multiple IP and DNS addresses to host their content will not work if added to the whitelist. Whilst you might be able to load certain aspects of those sites, you’ll soon run into issues loading content. In theory you could find all the IP’s and DNS addresses they use for their services, but in practice that would be an never ending battle of arcuately updating your address lists, and seems unsustainable long term.
To start, your routers working config is going to be a bit different to mine. This is ok, just adapt these settings to yours, and you should be all good. My LAN range is 10.0.0.0/24, I have a DHCP server on a bridge for Wi-Fi clients, and I’m using a mostly default firewall. I have no other LAN ranges or VLANS to consider.
Step 1:
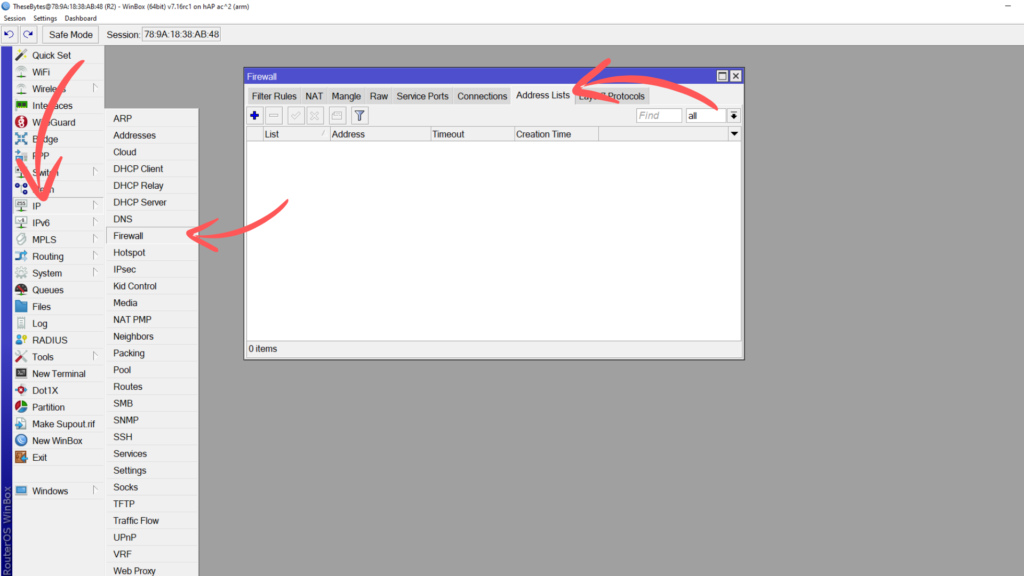
The first step is to create an address list which is going to act as our Whitelist. Go into you IP > Firewall > Address Lists.
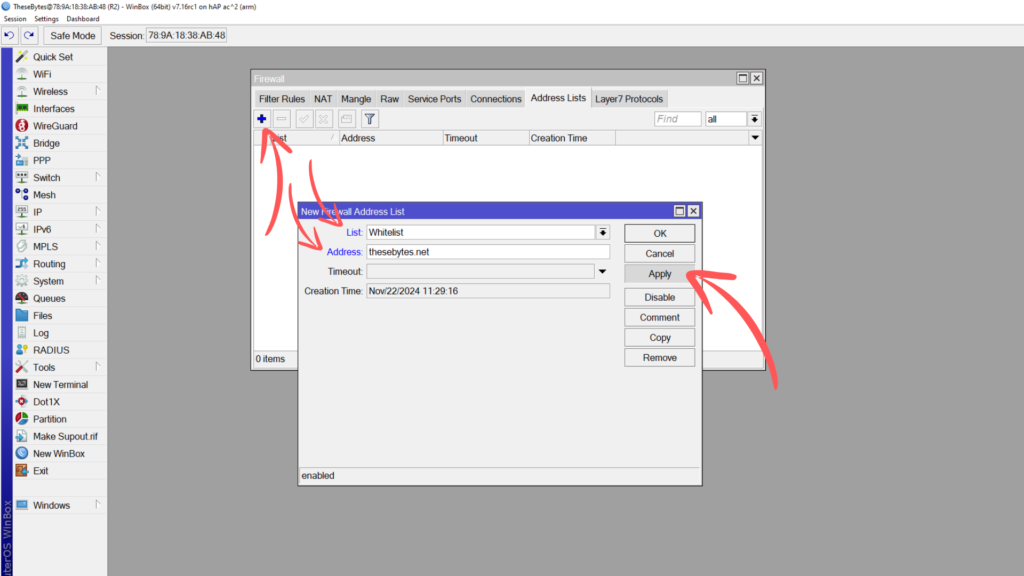
Click on the + button to add a new address list. Name this address list “Whitelist”, and add in the DNS address of a website you want your users to be able to reach. Make sure your router can resolve DNS addresses.
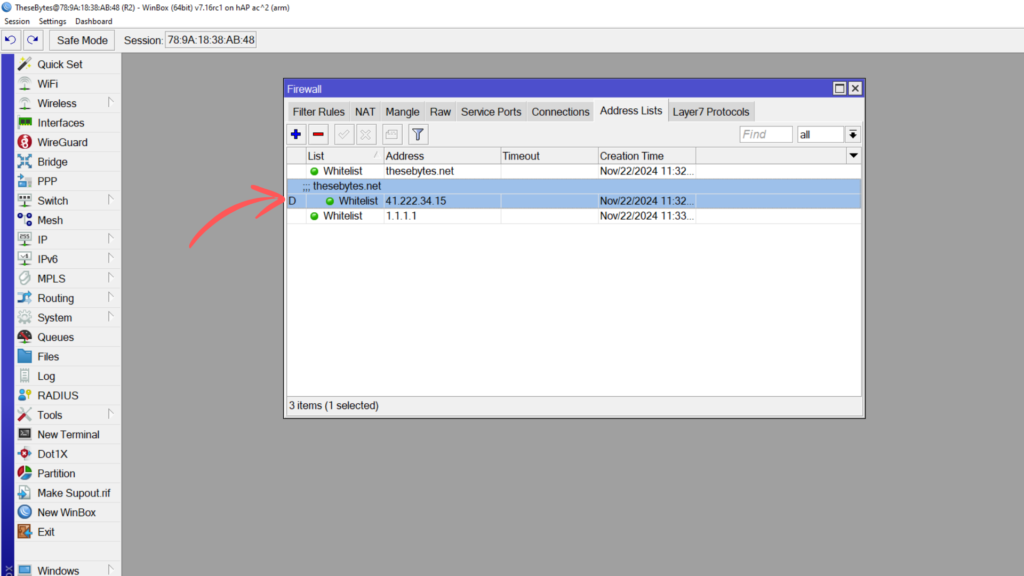
Once you have added your address list in, you’ll notice that the router dynamically adds in the IP address for the DNS address you put in. This is correct, and means that if the IP ever changes, your address list will also update automatically.
Go ahead and add in the IP address for any external DNS servers your hosts are using. If your hosts are using the router as their DNS server, then just make sure to allow remote requests in your IP > DNS settings and also in your firewall filers allow input from your LAN range with a dst port of 53 on UDP and TCP.
Step 2:
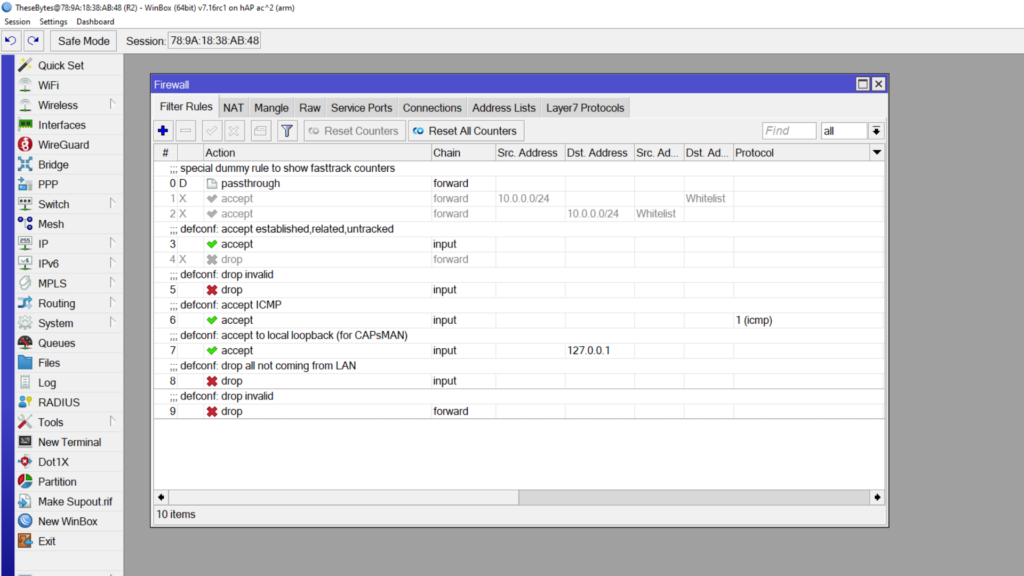
In step 2 we’re going to start configuring the firewall filters to work with the Whitelist address list. For this to work we will only need 3 forward chain filters. The order of these rules is important and you’ll need to make careful note of your current firewall setup when adding these in to make sure nothing is preventing it from working.
The disabled firewall rules in the image below are what you’ll need to add in to your firewall. I break down how to add each one, and what each rule does below:
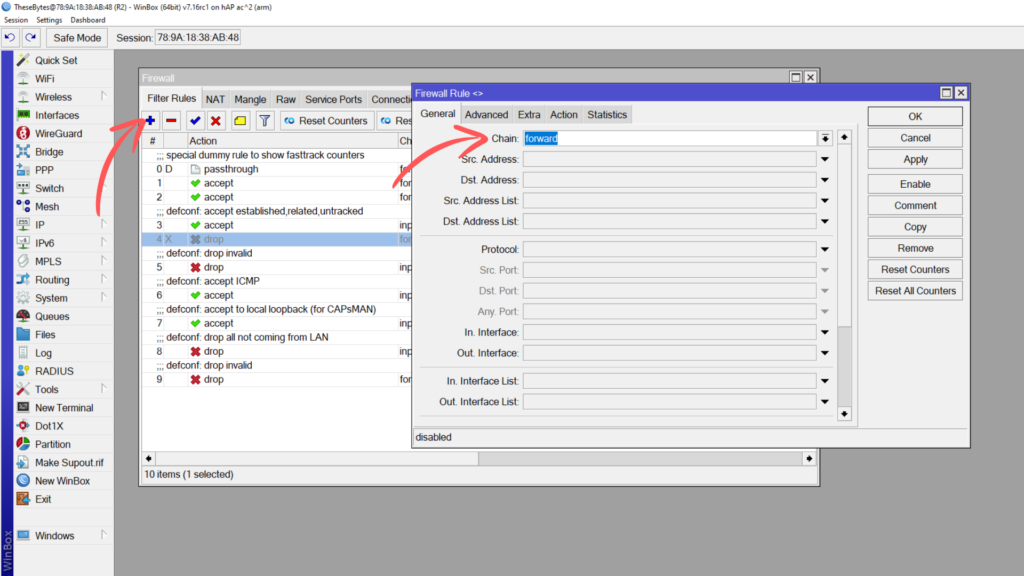
Lets start by adding in the first filter rule. To add it in, go to the Filters tab in your firewall, and click on the + button to add a new filter. In the General tab, in the corresponding fields, add the following:
Chain: Forward
Src Address: <Your LAN Range>
Dst Address List: Whitelist
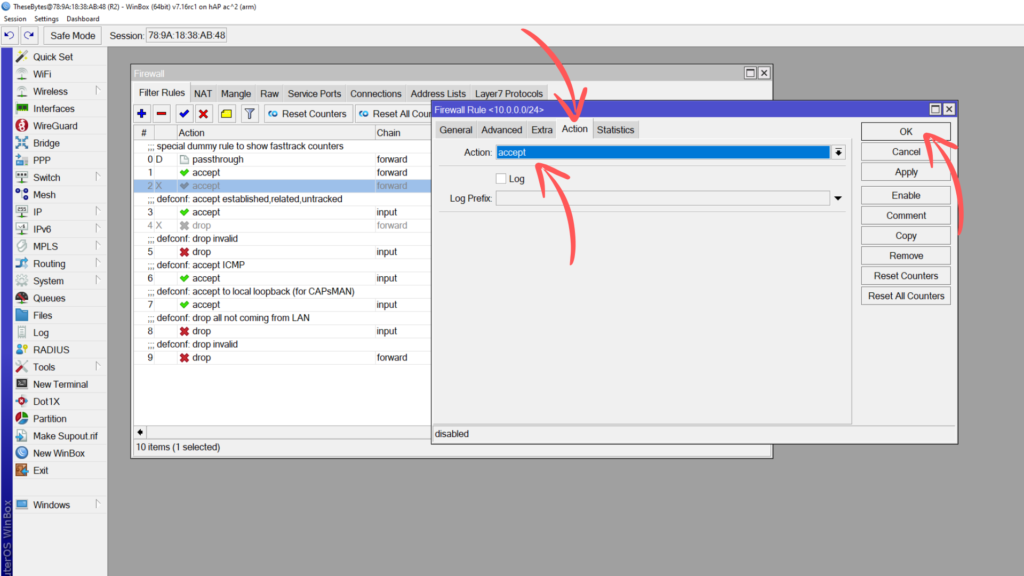
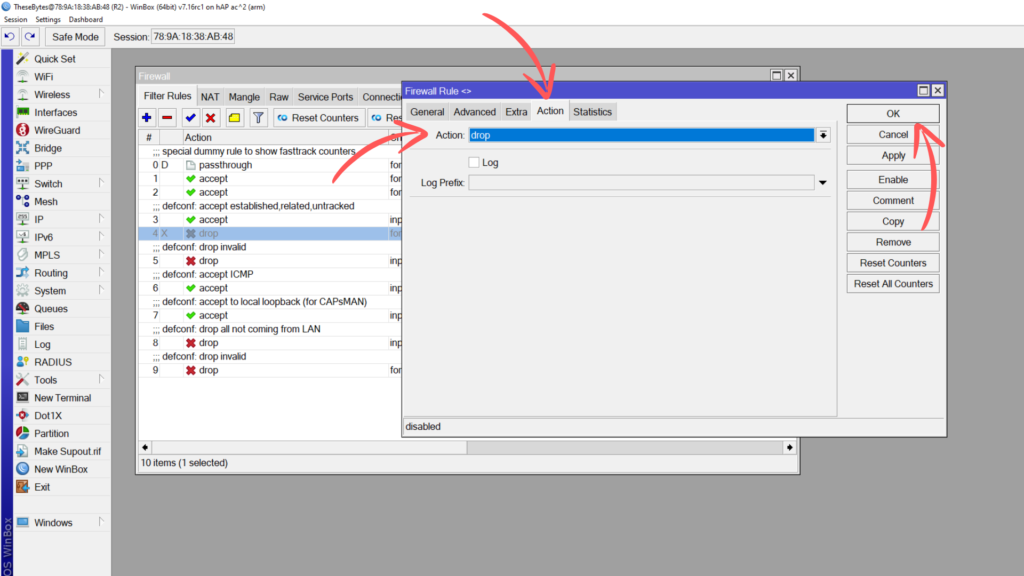
In the action tab, ensure that the Action is set to Accept, then press OK to add this filter rule to the firewall. Drag the filter rule into the correct place for your firewall in order for it to have an effect.
This filter rule tells the router to allow and forward any traffic on the forward chain originating from 10.0.0.0/24 going to any address in our Whitelist address list.
Next we need to add a filter rule in for the return traffic once the external server sends its response back to out hosts; Important to note that Connection Tracking must be enabled for this to work. If Connection Tracking is disabled, this will be on the Input chain.
Click on the plus button to add a new filter:
Chain: Forward
Dst Address: <Your LAN Range>
Src Address List: Whitelist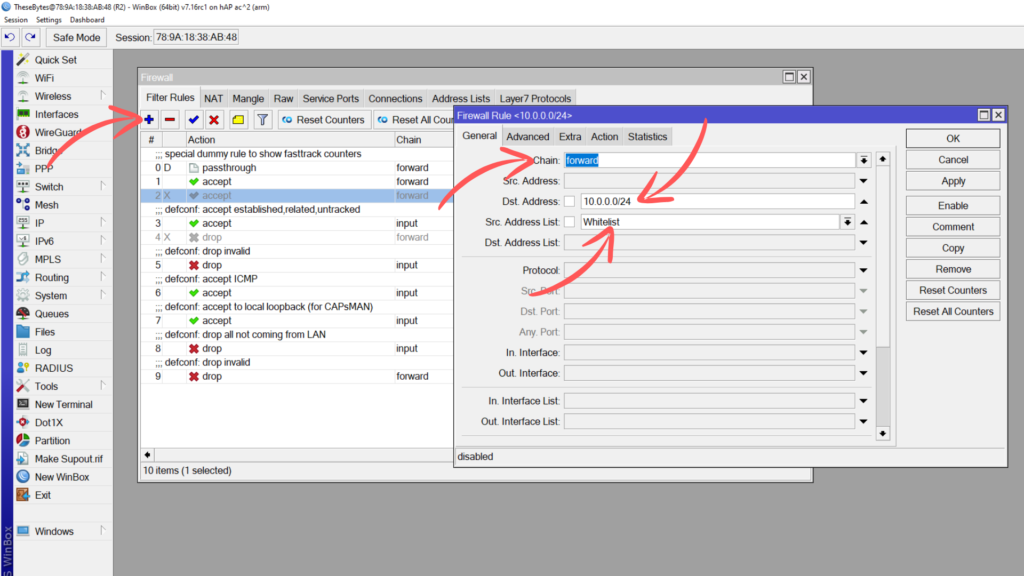
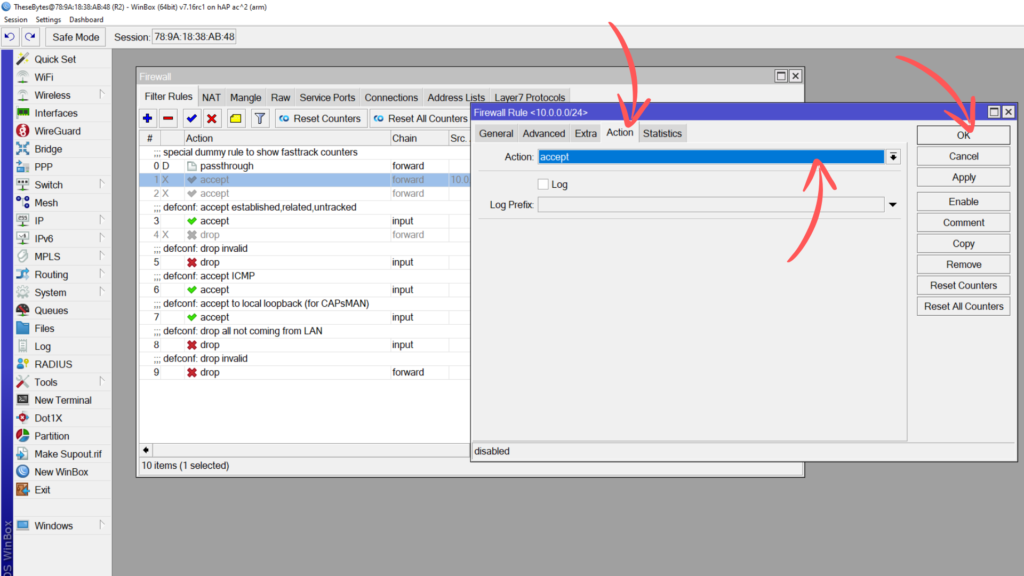
In the action tab, ensure that the Action is set to Accept, then press OK to add this filter rule to the firewall. Drag the filter rule under the first one we added in.
The 3rd and final filter we need to add in, simply drops all forwards in any direction to anywhere. This is ok to have in, because we have our allowed forward rules above it. This would be called a “catch all” rule that only affects traffic that doesn’t match any of the rules above it. This is effectively the rule that prevents users from visiting sites that aren’t in our whitelist. If you have any other LAN ranges or management networks, make sure that this drop all rule targets only the LAN range you want to make use of the whitelist. You will need to add a second drop all rule for return traffic too.
Click on the + button to add a new filter rule, set this filter rule on the forward chain. Leave everything else blank.
Switch over to the Actions tab, and set the action to Drop. Click ok, and drag this rule under your 2 other rules, or anywhere that’s appropriate.
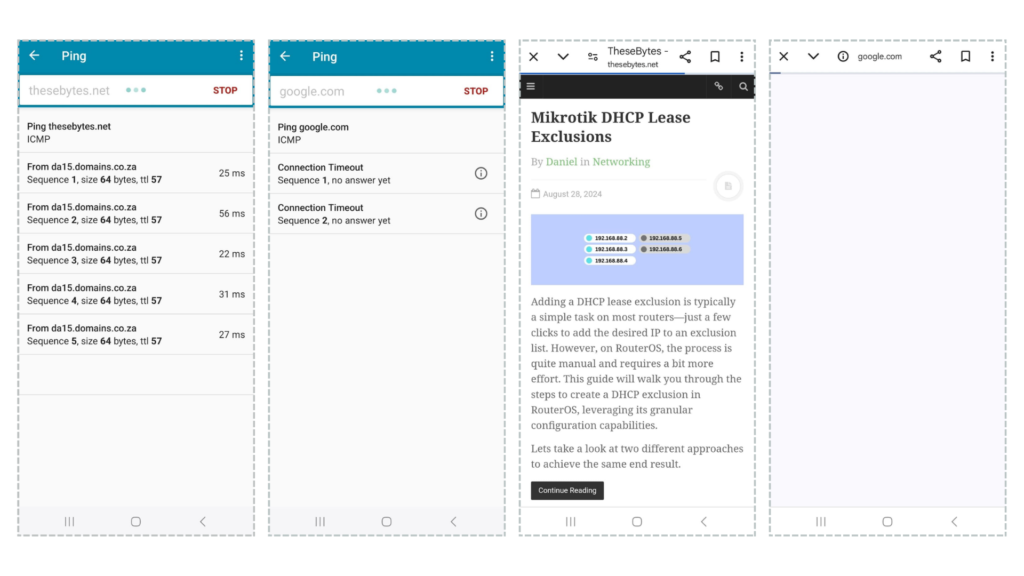
If you connect a host, you should now be able to ping and navigate to any sites on your Whitelist, but not to anything that’s not.